
Follow Me On Pinterest!
Artisan Bread Recipe days are usually born out of a very specific problem, you want real bread tonight, but you do not want a big project. I have been there, staring at the pantry, wishing something warm and crusty could just happen. This is the loaf I make when I want that bakery vibe at home with simple ingredients and a little patience. It is the kind of bread that makes your kitchen smell like you have your life together, even if you do not. If you have ever felt intimidated by baking bread, this is a friendly place to start.
Why You’ll Love This Recipe
First, it is forgiving. This is not the kind of bread that demands perfection or fancy skills. If you can stir, wait, and preheat an oven, you can make this.
Second, you get that crackly crust and chewy inside that people associate with “real” bakery loaves. I love slicing it while it is still slightly warm, then watching butter melt into all those little holes. It feels like a small win, and honestly, those matter.
Here is what makes it a repeat recipe in my kitchen:
Low effort, high reward with a simple dough you mix by hand.
No stand mixer required, no complicated shaping, no stress.
Great for beginners because the dough is meant to look a little rustic.
Flexible timing since most of the “work” is just letting it rest.
I also like that it pairs with basically anything. Soup night, pasta night, breakfast toast, you name it. Once you make it a couple times, you will start finding excuses to bake another loaf.
What You Need
Let’s keep this simple and practical. You do not need a bread machine. You do not need specialty flours. You just need a few basics and one key piece of equipment that helps with the crust.
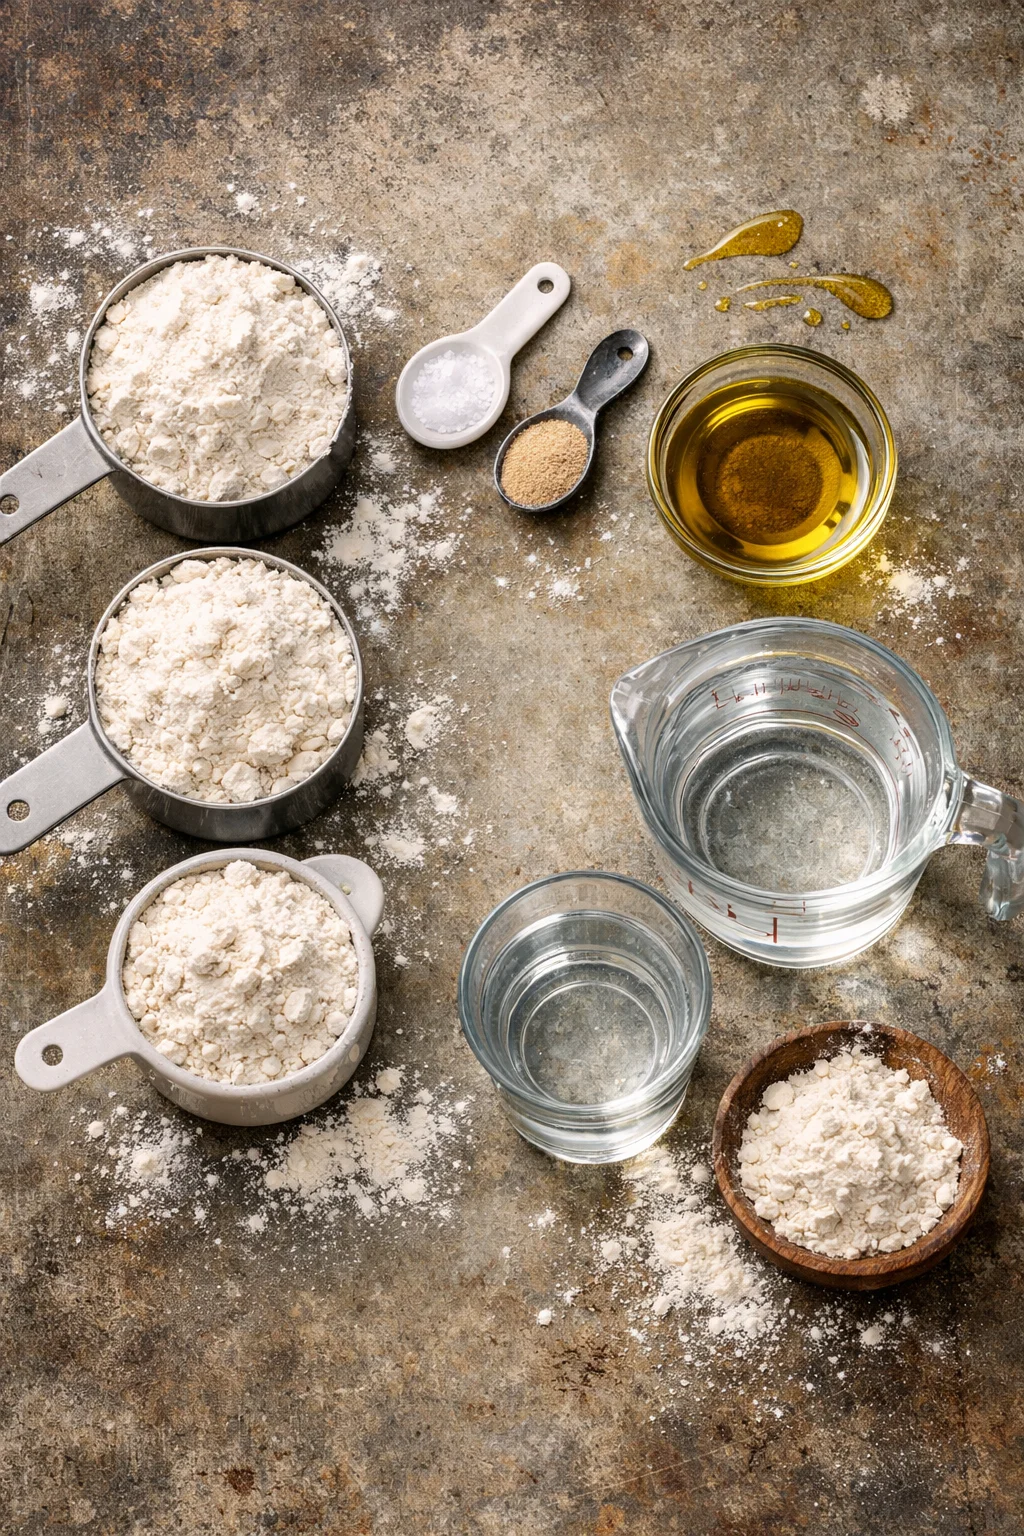
Ingredients and basic tools
- Flour: all purpose flour works great. Bread flour is fine too if that is what you have.
- Yeast: instant yeast or active dry yeast. Both work.
- Salt: do not skip it, it makes the bread taste like bread.
- Warm water: think warm tap water, not hot. Hot can mess with the yeast.
- Optional: a little olive oil for the bowl, and a bit of extra flour for your hands.
Tools I recommend:
- A large mixing bowl
- A wooden spoon or sturdy spatula
- Measuring cups and spoons
- A Dutch oven with a lid for the best crust, or a heavy oven safe pot with a lid
- Parchment paper (helpful, but optional)
Quick tip: if you do not have a Dutch oven, you can still bake it on a sheet pan, but you will lose some of that dramatic crust. I will explain an easy workaround later.
How to Make Artisan Bread
This is the part where I talk you through it like we are in the kitchen together. The dough will look shaggy at first. That is normal. This is a “stir it and let it do its thing” style of bread.
Here is the simple method I use most often:
Step 1: Mix the dough. In a big bowl, stir together 3 cups flour, 1 and 1 half teaspoons salt, and 1 half teaspoon yeast. Pour in 1 and 1 half cups warm water and stir until everything is combined. It will look sticky and messy. Perfect.
Step 2: Let it rise. Cover the bowl with plastic wrap or a clean towel. Let it sit at room temperature until it looks puffy and doubled. This usually takes 2 to 3 hours, depending on how warm your kitchen is.
Step 3: Preheat your oven and pot. Put your Dutch oven with the lid into the oven and preheat to 450 degrees F. Let it heat for at least 30 minutes. This is what helps you get that beautiful crust.
Step 4: Shape gently. Sprinkle a little flour on your counter. Scrape the dough out and fold it over itself a few times to form a rough ball. Do not overthink it. If it looks imperfect, you are doing it right.
Step 5: Bake. Carefully place the dough into the hot pot. I like lowering it in on parchment paper so I do not burn my hands. Cover with the lid and bake 30 minutes. Then remove the lid and bake 10 to 15 minutes more until deep golden brown.
Step 6: Cool. This is the hard part. Let it cool at least 30 minutes before slicing. If you cut too soon, the inside can turn gummy.
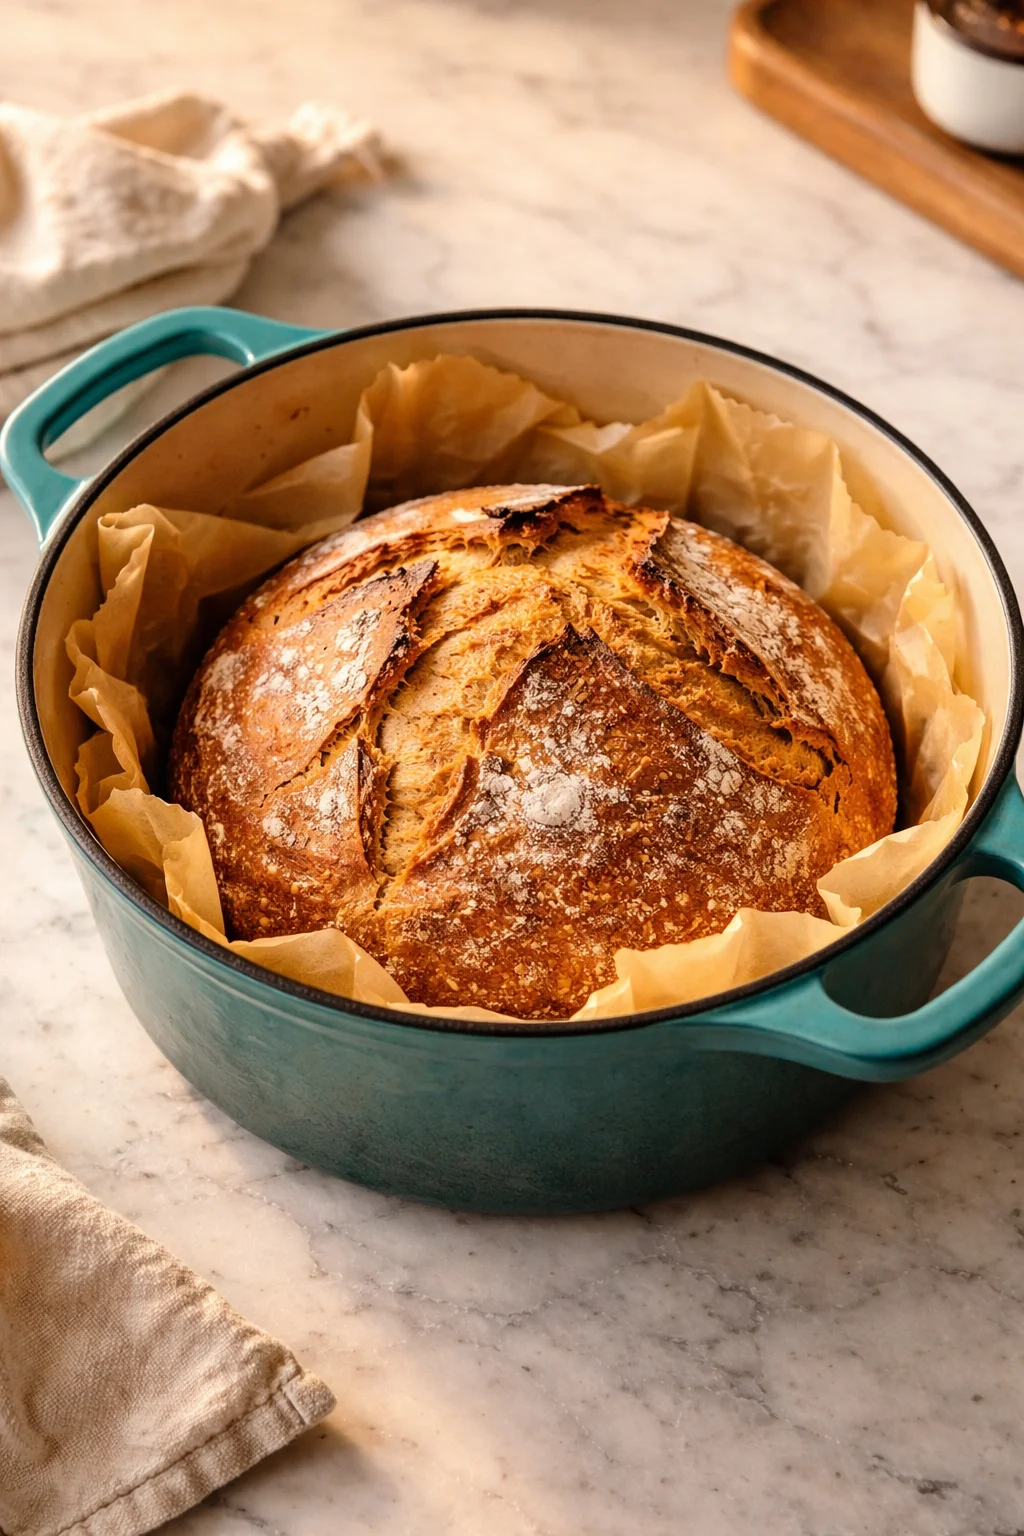
And that is it. That is the magic. The first time I made this, I actually laughed when I pulled off the lid and saw the loaf. It looked like something from a bakery window.
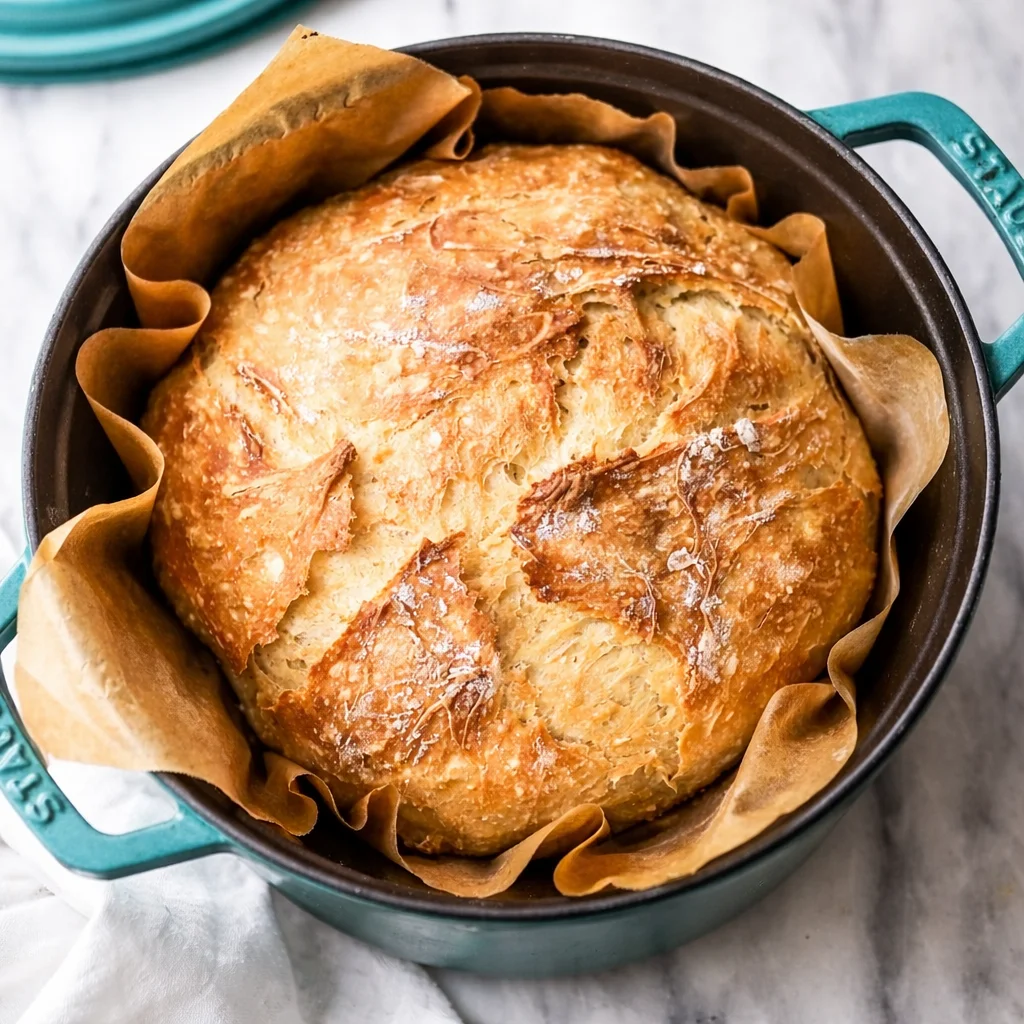
What is Rustic Artisan Bread?
Rustic artisan bread is basically bread that is meant to look natural and handmade, not perfectly uniform like sandwich bread. It usually has a crisp crust and a chewy inside with irregular holes. You are not aiming for a neat square loaf here. You are aiming for something that looks like you baked it in your own kitchen, because you did.
People call it “artisan” because it has that old school feel, simple ingredients, longer resting time, and a focus on texture and flavor rather than speed. The funny thing is, once you get used to it, this style can feel easier than traditional kneaded bread.
If you are wondering if this Artisan Bread Recipe counts, yes. It is exactly that kind of loaf. It is simple, honest, and a little rugged looking in the best way.
“I tried this on a Sunday afternoon and my family thought I bought it from a bakery. The crust was unreal, and the inside stayed soft for days.”
The Bread Making Process Step by Step
Sometimes it helps to understand what is happening, without getting too sciencey. Here is the bread process in plain language, plus a few tips that saved me from rookie mistakes.
Timing, texture, and little fixes
Mixing: You are just combining flour, water, yeast, and salt so the dough can start forming. If it is sticky, that is normal for rustic loaves. Sticky dough bakes up airy.
Rising: This is when the yeast does the heavy lifting. If your kitchen is cold, the dough will take longer. If you are in a hurry, place the bowl in a slightly warm spot, like near the oven while it preheats.
Shaping: Do not punch it down aggressively. Be gentle. Rough handling can knock out the air you waited for.
Baking covered, then uncovered: The lid traps steam. Steam is what helps the crust form and lets the bread rise more in the oven. Taking the lid off near the end helps it brown.
Cooling: Cooling finishes the inside. I know it smells amazing, but give it a little time.
If you do not have a Dutch oven, you can still make this Artisan Bread Recipe. Bake it on a preheated sheet pan, and place a metal pan on the bottom rack of the oven. When you put the bread in, carefully pour hot water into that empty pan to create steam. Keep your face and hands back when you do it. It works surprisingly well.
One more real life tip: write down what you did. The water amount, the rise time, how brown you baked it. Bread is simple, but small changes make a difference, and you will feel like a wizard when you dial it in for your kitchen.
Common Questions
Q: My dough is super sticky. Did I mess up?
A: Probably not. Sticky dough is normal for this style. Use a little flour on your hands and counter, but do not add tons of flour or the loaf can turn dense.
Q: Can I let the dough rise overnight?
A: Yes. Cover it and put it in the fridge. The next day, let it sit on the counter for 30 to 60 minutes before baking so it is not ice cold.
Q: How do I know the bread is done?
A: Look for a deep golden crust. If you tap the bottom, it should sound hollow. If you have a thermometer, the center should be around 200 to 210 degrees F.
Q: Why did my bread turn out dense?
A: Most often it needs more rising time, or the yeast is old. Also, too much extra flour during shaping can weigh it down.
Q: How should I store it?
A: Let it cool completely, then store it loosely wrapped at room temp for 2 days. After that, slice and freeze it so you can toast pieces whenever you want.
A loaf worth making again and again
If you have been wanting a simple, reliable Artisan Bread Recipe that actually fits into real life, this one is it. You mix, you wait, you bake, and suddenly you have a crusty loaf that makes even a basic dinner feel special. If you want to compare approaches or pick up extra tips, I also like checking out Artisan Bread – Sugar Spun Run because it is a solid resource when you are in a bread mood. Now go turn on your oven, grab that bowl, and give it a try once, and then tell me you do not feel just a little proud when you crack into that first slice.
Rustic Artisan Bread
A simple and forgiving artisan bread recipe that yields a crusty loaf with a chewy interior, perfect for beginners and great for pairing with any meal.
Ingredients
Main Ingredients
- 3 cups all-purpose flour (or bread flour) You can use bread flour if available.
- 1.5 teaspoons salt Do not skip it; it enhances the flavor.
- 0.5 teaspoon instant yeast or active dry yeast Both types of yeast work well.
- 1.5 cups warm water Warm tap water is recommended, not hot.
- optional olive oil For greasing the bowl.
- optional extra flour For dusting your hands and the counter.
Instructions
Preparation
- In a big bowl, stir together 3 cups of flour, 1.5 teaspoons of salt, and 0.5 teaspoon of yeast.
- Pour in 1.5 cups of warm water and stir until everything is combined, resulting in a sticky and messy dough.
- Cover the bowl with plastic wrap or a clean towel and let it sit at room temperature until it is puffy and doubled, typically 2 to 3 hours.
Baking
- Preheat your oven to 450°F (230°C) with a Dutch oven (with the lid) inside for at least 30 minutes.
- Sprinkle flour onto your counter, scrape the dough out, and gently fold it over itself a few times to form a rough ball.
- Carefully place the dough into the hot pot (preferably on parchment paper), cover with the lid, and bake for 30 minutes.
- Remove the lid and bake for an additional 10 to 15 minutes until the bread is deep golden brown.
Cooling
- Let the bread cool for at least 30 minutes before slicing to avoid a gummy interior.
Notes
Bread making is forgiving, and this recipe results in a lovely rustic loaf. If you lack a Dutch oven, you can use a preheated sheet pan but expect a less dramatic crust. Remember, sticky dough is normal for artisanal style bread.