
Follow Me On Pinterest!
You know those tantalizing little tarts you see at bakeries, gleaming with fruits and glistening with glaze? Every time I pass by, I’m reminded of my grandma, who served up these sweet delights for birthdays and holidays. They’re a symphony of buttery pastry and vibrant fruit—like a carnival for your taste buds, really! The Mini Danish Fruit Tart Pastry is not just a dessert; it’s a celebration of life’s simpler joys, and I can’t wait to share it with you.
This recipe is on regular rotation at my house because it satisfies my sweet tooth without being overly heavy. It’s the kind of dessert that feels fancy yet is surprisingly easy to whip up. Perfect for impressing guests or simply treating yourself after a long week! Now, let’s dive into why you absolutely need to try making these tarts tonight.
What makes this recipe special
There’s a certain magic in these mini tarts. They’re not just visually captivating; they burst with fresh flavors and textures that make them irresistible. The contrast of the flaky pastry, the creamy filling, and the juicy fruits creates a melange that dances on your palate. Plus, you can customize them based on what fruits are in season or your personal favorites—talk about versatility!
But here’s the kicker: they’re not hard to make at all. Even if you’re not a baking whiz, you can confidently step into the kitchen and create a dessert that feels gourmet. And once you’ve tasted the fruits of your labor, you’ll feel like a culinary rock star! So, what are we waiting for? Let’s gather our ingredients.
Key ingredients overview

Alright, before we dive into the cooking process, here’s what you’ll need:
- All-purpose flour (1 ½ cups): This is the backbone of your pastry. Feel free to swap for a gluten-free blend if that’s your preference.
- Unsalted butter (½ cup, cold): The star ingredient for that rich, flaky texture. Pro tip: cut it into small cubes to make the mixing easier.
- Granulated sugar (¼ cup): A little sweetness to balance out the richness of the butter.
- Salt (½ tsp): Just a pinch makes a world of difference—don’t skip this!
- Cold water (4-5 tbsp): Essential for bringing the dough together. Use ice water for the best results.
- Cream cheese (8 oz, softened): This adds a luscious creaminess to our tart filling. Make sure it’s at room temperature for easy blending.
- Powdered sugar (½ cup): For sweetening that smooth cream cheese mix.
- Vanilla extract (1 tsp): A secret weapon for elevating flavors; trust me, it makes a difference.
- Assorted fresh fruits (like strawberries, blueberries, or kiwi): These beauties are the stars of the show! Pick fruits that will pop with color and flavor.
- Fruit glaze (optional): For that shiny finish. You can buy it pre-made or create your own with fruit preserves and a splash of water.
Preparing Mini Danish Fruit Tart Pastry
Let’s roll up those sleeves and get cooking! This process is a delightful journey.
In a large mixing bowl, whisk together the flour, sugar, and salt. This is your dry team—let them mingle for a moment.
Next, add the cold butter cubes. Using a pastry cutter or your fingers, work the butter into the flour mix until you see pea-sized crumbs. This is key for that flaky texture!
Gradually add cold water, one tablespoon at a time, mixing gently until the dough starts to hold together. Don’t overwork it—remember, less is more!
Shape the dough into a disk, wrap it in plastic wrap, and chill in the fridge for at least 30 minutes. This allows the gluten to relax.
While the dough chills, let’s make the filling! Beat the softened cream cheese until smooth. Then add the powdered sugar and vanilla extract, mixing until you have a creamy dream.
Preheat your oven to 375°F (190°C). Roll out your chilled dough on a floured surface to about 1/8 inch thick. Cut into circles, then place them into mini tart pans.
Fill each pastry shell with the cream cheese mixture, leveling it off with a spatula. Now, let’s get creative and arrange your fruit atop the cream cheese!
Bake in the preheated oven for 15-18 minutes until the edges are golden brown. Allow them to cool completely before glazing.
- Keep your butter cold! It’s crucial for that flaky pastry texture.
- If you want to get fancy, you can alternate the fruit patterns for a stunning visual effect.
- Chill your dough longer if it’s warm in the kitchen—that’ll help to keep it together when rolling.
- Citrus Burst: Add a layer of lemon curd between the cream cheese and fruits for a tangy kick.
- Chocolate Drizzle: A drizzle of melted dark chocolate atop each tart adds decadence!
- Berry Mix: Swap out the traditional fruits for any seasonal berries for a colorful delight.
- 1 ½ cups All-purpose flour
- ½ cup Unsalted butter (cold, diced)
- ¼ cup Granulated sugar
- ½ tsp Salt
- 4-5 tbsp Cold water
- 8 oz Cream cheese (softened)
- ½ cup Powdered sugar
- 1 tsp Vanilla extract
- Assorted fresh fruits
- Fruit glaze (optional)
- Mix flour, sugar, and salt in a bowl.
- Add cold butter and blend until crumbly.
- Gradually add cold water to form a dough. Shape into a disk and refrigerate for 30 minutes.
- Beat cream cheese until smooth, then mix in powdered sugar and vanilla.
- Preheat oven to 375°F. Roll dough and cut into circles for tart pans.
- Fill each shell with cream cheese mixture and top with fruit.
- Bake for 15-18 minutes until edges are golden. Cool before glazing.
- Can I use a different type of fruit? Absolutely! Use any fresh seasonal fruit you adore.
- What if I’m gluten-free? Use a gluten-free flour blend in place of the all-purpose flour.
- How long do these keep? Store in an airtight container in the fridge for up to 3 days.
- Can I make the pastry ahead of time? Definitely! You can prepare the dough a day in advance and refrigerate it.
- How can I make them healthier? Use low-fat cream cheese and load up on fresh fruits for a guilt-free treat!
How to plate and pair
Presentation is key, darling! Arrange your mini tarts on a beautiful serving platter, drizzling them with that vibrant fruit glaze if you’re using it. You can garnish with fresh mint leaves for a touch of elegance. These little beauties shine when served alongside a cup of tea or coffee, but they can also hold their own at a lively outdoor gathering!
Keeping leftovers fresh
If you have any leftovers—though, let’s be honest, that’s a big if—store them in an airtight container in the fridge for up to 3 days. Just keep them separate from the glaze until you’re ready to enjoy them again. You can freeze the unfilled pastry shells if you’d like—just make sure they cool completely before popping them in a freezer bag.
Helpful cooking tips
Different ways to try
Feeling adventurous? Here are a few delightful twists to consider:
Ingredients
Directions to follow
Your questions answered
Making these Mini Danish Fruit Tart Pastries is a rewarding way to express your love for baking and delight your taste buds. They embody everything that’s joyful about sweet treats: color, flavor, and creativity! So why not give it a try? Get in the kitchen, have fun with it, and remember, each tart is a canvas waiting for your unique touch! I can’t wait to hear how they turn out for you—let’s create delicious memories together!

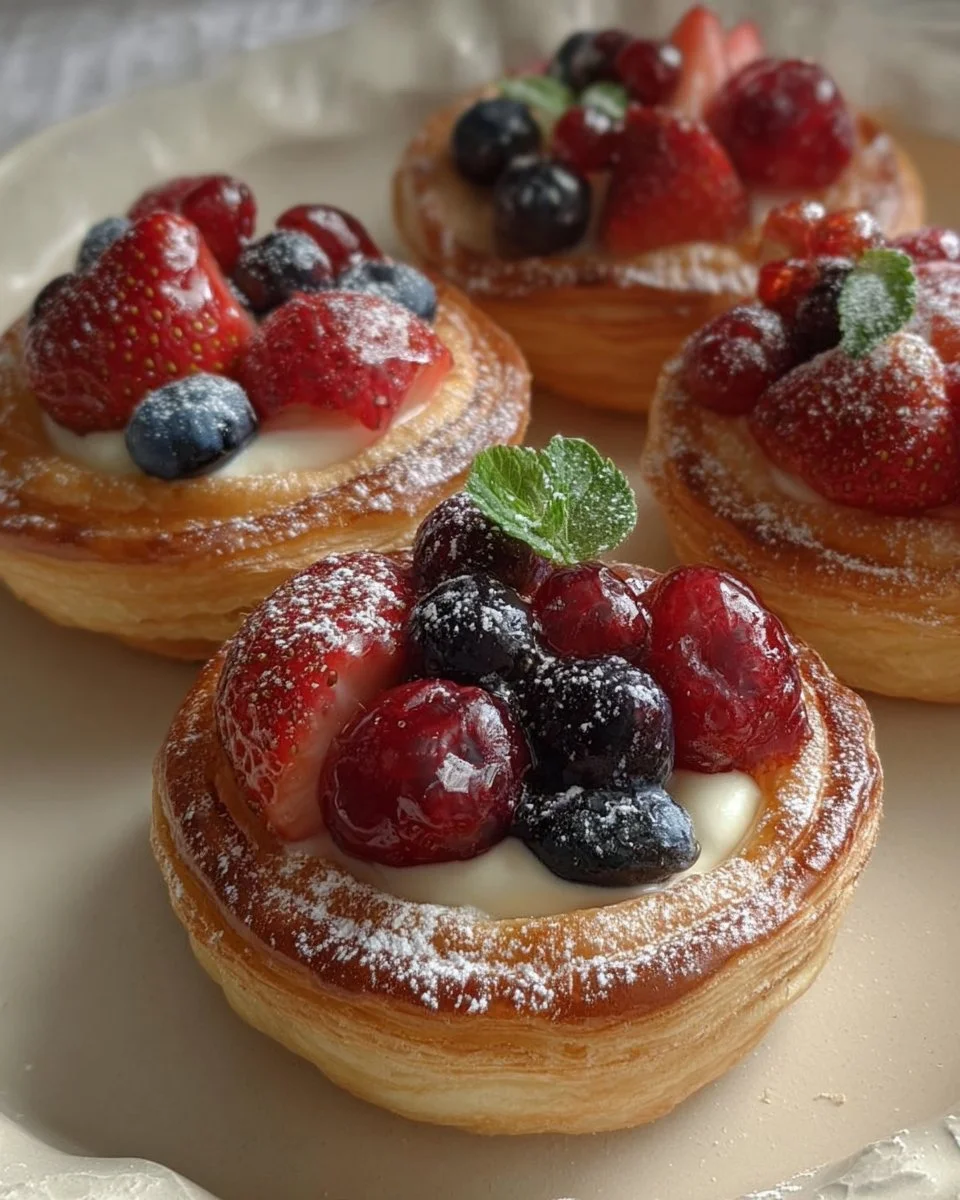
Mini Danish Fruit Tart Pastry
A delightful dessert featuring a buttery pastry filled with cream cheese and topped with fresh, vibrant fruits.
Ingredients
For the pastry
- 1.5 cups All-purpose flour Feel free to swap for a gluten-free blend if that’s your preference.
- 0.5 cups Unsalted butter (cold, diced) Cut into small cubes to make mixing easier.
- 0.25 cups Granulated sugar A little sweetness to balance out the richness of the butter.
- 0.5 tsp Salt Don’t skip this!
- 4-5 tbsp Cold water Use ice water for the best results.
For the filling
- 8 oz Cream cheese (softened) Make sure it’s at room temperature for easy blending.
- 0.5 cups Powdered sugar For sweetening the cream cheese mix.
- 1 tsp Vanilla extract A secret weapon for elevating flavors.
For the topping
- Assorted fresh fruits (like strawberries, blueberries, or kiwi) Pick fruits that will pop with color and flavor.
- Fruit glaze (optional) You can buy it pre-made or create your own with fruit preserves and a splash of water.
Instructions
Preparation
- In a large mixing bowl, whisk together the flour, sugar, and salt.
- Add the cold butter cubes. Using a pastry cutter or your fingers, work the butter into the flour mix until you see pea-sized crumbs.
- Gradually add cold water, one tablespoon at a time, mixing gently until the dough starts to hold together.
- Shape the dough into a disk, wrap it in plastic wrap, and chill in the fridge for at least 30 minutes.
Making the filling
- Beat the softened cream cheese until smooth. Then add the powdered sugar and vanilla extract, mixing until creamy.
Baking
- Preheat your oven to 375°F (190°C). Roll out your chilled dough on a floured surface to about 1/8 inch thick.
- Cut into circles, then place them into mini tart pans.
- Fill each pastry shell with the cream cheese mixture and arrange the fruit atop.
- Bake in the preheated oven for 15-18 minutes until the edges are golden brown.
- Allow them to cool completely before glazing.
Notes
Store leftovers in an airtight container in the fridge for up to 3 days. You can freeze the unfilled pastry shells if you’d like.